
What the noise is telling you
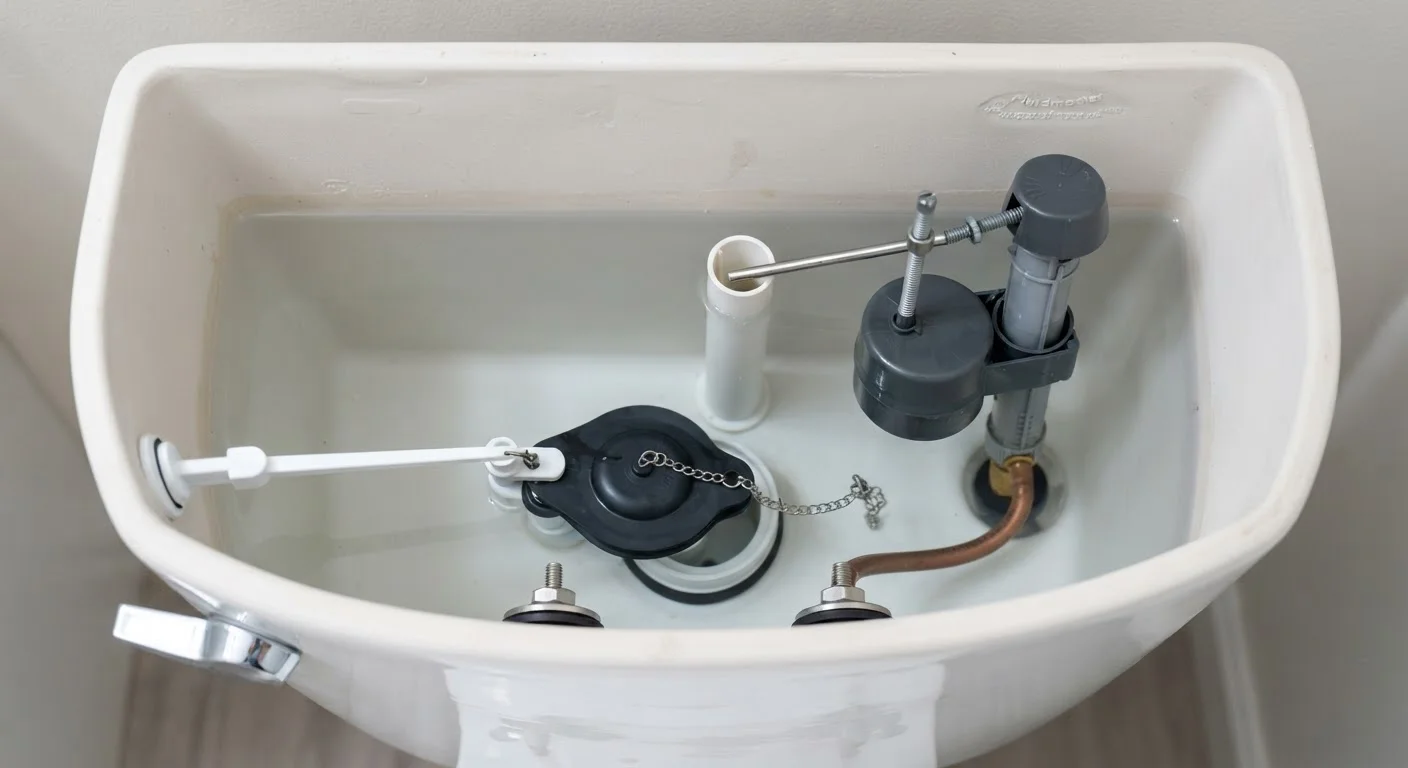
A toilet that runs between flushes is wasting water continuously. The sound, whether a steady hiss, a trickle, or a fill cycle that kicks on every few minutes, comes from water escaping somewhere it should not. Inside the tank, three components control the entire process: the flapper, the float, and the fill valve. When any one of them fails, the tank either leaks into the bowl or overfills and spills into the overflow tube.
Understanding which part is failing before buying anything saves time and money. The sections below walk through diagnosis first, then repair.
Adjustable pliers or channel-lock pliers
Used to loosen and tighten the lock nut securing the fill valve to the bottom of the tank.
Sponge and bucket
Used to remove remaining water from the tank after shutting off the supply.
Food coloring or dye tablet
Dropped into the tank to test whether the flapper is leaking into the bowl without flushing.
Replacement flapper
Replaces a worn or warped flapper that no longer creates a watertight seal.
Replacement fill valve
Replaces a faulty fill valve that hisses, runs constantly, or fails to shut off after filling.
Towels or rags
Used to contain drips and protect the floor when disconnecting the supply line.
Diagnosing the problem
Test the flapper first
The flapper is a rubber seal at the bottom of the tank. It lifts when you flush and drops back down to hold water while the tank refills. Over time, rubber degrades, warps, or builds up mineral deposits, and the seal leaks.
To test it, add a few drops of food coloring to the tank water. Wait ten minutes without flushing. If the color appears in the bowl, water is seeping past the flapper. A leaking flapper is the single most common cause of a running toilet.
Check the float height
The float controls when the fill valve shuts off. If the float is set too high, water fills past the overflow tube (the tall plastic tube in the center of the tank) and drains away constantly. Look inside the tank after a full fill cycle: the water line should sit about one inch below the top of the overflow tube. If it is at or above that tube, the float needs adjustment.
Older ball-float assemblies have an adjustment screw or a bendable arm. Newer cup-style floats have a pinch clip or a threaded rod you turn to raise or lower the water level.
Listen to the fill valve
If the flapper tests clean and the float is set correctly but the toilet still runs, the fill valve itself may be worn. A hissing sound that continues long after the tank is full, or a fill cycle that never fully stops, points to a valve diaphragm or seal that has deteriorated. Fill valves are inexpensive and straightforward to swap out.
Shut off the water supply first
Before removing any tank parts, turn the shutoff valve clockwise until it stops. It sits on the wall behind or below the toilet. Working with the supply line still open can cause water to spray or overflow. If the valve is stuck or corroded, turn off the main house supply instead.
How to fix each problem
Photograph the parts before disassembly
Take a quick photo of the fill valve, chain length, and float position before you remove anything. That reference image makes reassembly straightforward and helps you match parts at a hardware store. Chain slack is especially easy to forget: aim for about half an inch of slack between the flapper and the flush handle arm.
Shut off water and empty the tank
Turn the shutoff valve clockwise until it stops. Flush the toilet to drain most of the water, then use a sponge and bucket to remove what remains. Dry the inside of the tank with a rag so you can work cleanly.
Inspect and replace the flapper
Unhook the flapper's ears from the pegs on the overflow tube and disconnect the chain from the flush handle arm. Run your finger around the rubber seal: if it feels soft, slimy, warped, or has visible cracks, replace it. Bring the old flapper to the hardware store to match the size. Snap the new flapper onto the overflow tube pegs and reconnect the chain, leaving about half an inch of slack.
Adjust or replace the float
If the flapper is fine but water is spilling into the overflow tube, adjust the float down. On a ball-float, bend the arm slightly downward or turn the adjustment screw counterclockwise. On a cup-float fill valve, pinch the clip and slide the float down the shaft, or turn the adjustment rod as directed by the markings on the valve body. Restore water, let the tank fill, and confirm the water line sits at least one inch below the overflow tube top.
Replace the fill valve if needed
With the tank empty, use adjustable pliers to loosen the lock nut underneath the tank where the fill valve shank passes through. Lift the old valve out. Insert the new fill valve through the same hole, following the manufacturer's height adjustment instructions so the critical fill line marker on the valve sits above the overflow tube. Hand-tighten the lock nut, then snag it one more quarter-turn with pliers. Reconnect the small refill tube to the top of the overflow tube.
Restore water and test
Turn the shutoff valve counterclockwise to restore water. Let the tank fill completely, then listen and observe. The fill valve should shut off cleanly within 60 to 90 seconds. The water line should rest below the overflow tube. Repeat the food coloring dye test to confirm the flapper holds. If everything passes, replace the tank lid.
When to call a plumber
Most running toilets are fixable in one visit to the hardware store. However, if the shutoff valve behind the toilet does not close fully, if there is visible corrosion on supply line fittings, or if the tank itself has a crack, those situations are worth a call to a licensed plumber. Attempting to force a stuck valve or work around a corroded fitting without the right experience can result in a larger water leak.
Also check local requirements: in some areas, work that involves cutting into supply lines or replacing the full toilet assembly may require a permit or a licensed tradesperson. Verify those rules with your local building or utilities department before proceeding.